Table of Contents
- What You Need to Know First Before DJI RS3 Setup
- Unbox Everything and Identify Each Part
- Charge and Activate the Battery
- Install DJI Ronin App and Prepare Your Phone
- Important Safety Notes Before Power-On
- Steps to Setup Gimbal DJI RS3 Without the Stress
- Step 1: Attach the Tripod and Battery Grip
- Step 2: Mount the Camera Using the Quick-Release Plates
- Step 3: Balance All 3 Gimbal Axes
- Step 4: Power On and Activate Gimbal in App
- Step 5: Auto-Tune for Perfect Motor Calibration
- Common Setup Issues and How to Fix Them (New Section from Community Insight)
- 1. Gimbal Shaking on Startup
- Fix
- 2. Roll Arm is Too Stiff to Move
- Fix
- 3. Micro Jitters in Footage
- Fix
- Final Words
- FAQs
- Why is my RS3 shaking during startup?
- Do I need to rebalance if I change lenses?
- What does ‘motor sleep mode’ mean?
- Final Setup Checklist (Print or Save This)
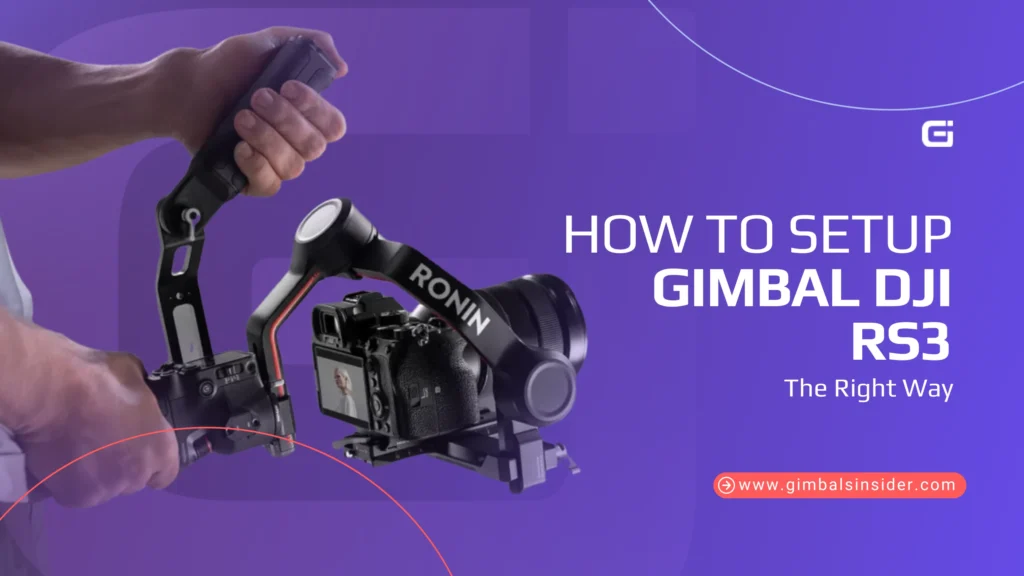
Struggling to figure out how to setup gimbal DJI RS3? Well, I was in the same spot. Between unclear manuals, confusing axis locks, and that delicate balancing act, it’s easy to feel stuck before you even start filming. Luckily, after some trial and error, I’ve got it working
So, to set up your DJI RS3, charge the battery, install the tripod, mount your camera, and balance all axes. Next, power it on, connect to the Ronin app, activate your gimbal, and use Auto-Tune to match motor strength to your camera setup.
Inside, you’ll learn —
- What each part does (and why it matters)
- How to properly mount and balance your camera
- The right way to activate and tune the motors
- Common mistakes and how to avoid them
Let’s get your RS3 running smoothly.
What You Need to Know First Before DJI RS3 Setup
If you’re setting yours up for the first time, you should know what each piece is meant to do. That little bit of prep saves hours of fixing later.
Unbox Everything and Identify Each Part
First and foremost, lay all the gear out. You don’t want to start connecting parts you haven’t actually figured out yet.
- Battery Grip: It powers the whole system. Needs a full charge before first use, and you’ll hear a click when it locks in properly.
- Tripod / Extended Grip: You’ll screw this into the bottom of the battery grip. Flip the legs out and you’ve got a reliable base to work from during setup.
- Quick-Release Plates (Upper + Lower): The upper plate mounts to your camera, the lower slides into the gimbal’s mounting plate. They’re meant to snap in and out quickly, but only when correctly locked into place.
- Lens Support: If you’re using a zoom or heavier lens, you’ll need this. I shoot with a Sigma 24–70mm, and it also helps avoid those micro-jitters.
- USB-C Charging Cable + Camera Control Cable: One charges the battery, the other links your camera to the gimbal. If you want to trigger record or focus from the gimbal handle, this second cable is essential.
Charge and Activate the Battery
Before anything else, plug in the battery grip using the included USB-C cable. That first charge is what actually activates the battery. I had to leave mine plugged in for about 2.5 hours to hit a full charge. You’ll see the LED lights blink during charging and go solid once it’s topped up. While waiting, you might want to explore some of the gimbal’s features—like what is FPV mode in gimbal?—to get a better understanding of how it works and how to make the most of your equipment.
Once it’s fully charged, you’re ready to slot it into the gimbal and start the real work.
Install DJI Ronin App and Prepare Your Phone
Before you even think about powering on your RS3, make sure your phone is ready.
- Download the DJI Ronin app. It works on both iOS and Android. I used mine on an iPhone, but any modern phone should handle it fine.
- Turn on Bluetooth, then power up the gimbal by holding the button.
- Once the RS3 shows up in the app, connect to it. You’ll be asked to log in or create a DJI account.
- Without activation, you only get five trial uses, and you don’t want to get stuck mid-shoot.
Important Safety Notes Before Power-On
Don’t power on the RS3 without a camera properly mounted. The motors will go wild trying to balance thin air, and you’ll end up staring at an error message or worse.
So, before anything powers up, unlock every axis. I once left just one locked and couldn’t figure out why my footage looked off. Turns out, that small mistake throws everything out of sync.
Also, make sure your camera is fully secured to the quick-release plate. If it shifts mid-setup, your balance and motors will both suffer. These setup steps are especially important when you understand the difference between gimbal and stabilizer, as gimbals rely heavily on electronic balance—making proper setup crucial for smooth footage.
Steps to Setup Gimbal DJI RS3 Without the Stress
Instead of guessing your way through how to setup gimbal DJI RS3, let me walk you through the exact steps I use.
Step 1: Attach the Tripod and Battery Grip
This first move sets the foundation literally.
- Start by mounting the tripod (or extended grip) to the base of the battery grip. It threads in like any standard tripod mount.
- Once it’s tight, flip the tripod legs out so the gimbal can stand upright on a flat surface. That stability is key while setting everything else up.
- Next, insert the battery grip into the gimbal’s base. Slide it in from the top until it clicks into place. If you don’t hear that “click,” it’s not seated right.
- Now, lock it in by turning the lever clockwise. That secures the connection and keeps the battery locked tight during operation.
- Once it’s mounted and locked, your base is stable, and you’re ready to build up from there.
Step 2: Mount the Camera Using the Quick-Release Plates
This part might look mechanical, but trust me, it makes or breaks the balance. Here’s how I do it now, every time.
- First, grab the upper quick-release plate and screw it snugly into the bottom of your camera. Double-check that it’s centered because if it’s off by even a few millimeters, you’ll feel it later when balancing.
- Next, unlock the lower plate that’s already seated on the gimbal. Slide your camera (with the upper plate attached) into that lower plate until it locks in with a solid click.
- Once the camera is in, lock the plate lever to secure it.
- If you’re using a heavy lens, especially something with zoom or front-heavy glass, attach the lens support.
Step 3: Balance All 3 Gimbal Axes
This is the part you can’t rush. If you skip proper balancing, you’ll burn through the battery, overwork the motors, and still end up with shaky footage.
Here’s how I break it down, axis by axis —
- Tilt Axis: Unlock the tilt axis and angle the camera so the lens faces straight up. If it flops forward or back, it’s not balanced. In that case, slide the mounting plate up or down until the camera holds position naturally.
- Roll Axis: Unlock the roll arm and see which way the camera leans. Slide the roll arm left or right until the camera stays flat at any tilt.
- Pan Axis: Tilt the gimbal forward a bit so the camera faces down, then unlock the pan axis. Swing the gimbal and stop. If the camera swings back on its own, you’re off-balance. Adjust the pan arm in or out until the camera stays still when rotated.
- Use the 15° Tilt Test: Tilt the gimbal 15° to one side. On the screen or app, you’ll see color indicators —
- Green = you’re good
- Yellow = close but not quite
- Red = way off and needs fixing
Step 4: Power On and Activate Gimbal in App
Now that everything’s mounted and balanced, it’s time to bring the RS3 to life.
- Start by pressing and holding the power button for a second until the screen lights up. You’ll hear a soft click and see the gimbal begin to initialize.
- Next, open the DJI Ronin app on your phone. Make sure Bluetooth is on. The RS3 should pop up in your device list automatically.
- Tap it and when prompted, enter the default Bluetooth password: 12345678.
- The app will walk you through a few quick steps to register and activate. DJI gives you five trial power-ons before activation becomes required, but honestly, I’d get this part out of the way now.
- Once it’s done, you won’t have to think about it again.
From here, you’re fully synced. The gimbal can now talk to your camera, tune its motors, and update itself all through the app.
Step 5: Auto-Tune for Perfect Motor Calibration
Even if your camera is perfectly balanced, your motors still need to know how much muscle to use. That’s where Auto-Tune comes in.
You can start the Auto-Tune in two ways —
- Tap it from the DJI Ronin app
- If you’re already holding the gimbal, press and hold the M button and the trigger at the same time. I usually go with the button shortcut when I’m on location.
What Auto-Tune actually does is test how heavy your setup is across the tilt, roll, and pan axes. Then it adjusts the motor strength automatically.
Most importantly, re-run Auto-Tune any time you change lenses, swap cameras, or even add gear like a mic or external monitor. Basically, if the weight shifts, run it again.
Learn More: 5 Simple Tips For Cinematic Gimbal Shots
Common Setup Issues and How to Fix Them (New Section from Community Insight)
Below are common gimbal issues and how to fix them —
1. Gimbal Shaking on Startup
If your RS3 jolts or vibrates aggressively when powered on, especially without a camera mounted, don’t panic. It’s a common behavior. The gimbal expects weight to balance its motors.
Without a camera, the motors can’t stabilize and end up overcorrecting. And that usually causes a violent shake.
Fix
Always mount and balance your camera before turning on the gimbal. The motors rely on that resistance to behave normally. Turning it on empty confuses the stabilization logic and triggers a motor protection fail-safe.
2. Roll Arm is Too Stiff to Move
When I first got my RS3, the roll axis adjustment rail felt completely stuck. At first, I thought something was wrong with the unit. But after doing a bit of digging, I realized it’s actually pretty common. Some RS3s are built with really tight tolerances right out of the box.
That doesn’t mean yours is defective, though. It just means the rail might need a little extra care to move.
Fix
Before forcing anything, double-check that the locks are fully released. If it’s still jammed, inspect for debris or manufacturing residue. Some resistance is normal with aluminum arms, but if it’s extreme, consider carefully disassembling or seeking support.
Never apply oil or lubricant as it could affect balance or attract dust. Instead, work the arm gently back and forth to loosen it gradually.
3. Micro Jitters in Footage
You might notice almost invisible shakes during editing. Well, they’re hard to ignore. Now, most of the time, those micro jitters are your gimbal’s motors overcorrecting. That’s usually because the balance is slightly off or the weight shifted mid-shoot.
If you’re using a zoom lens, even a small focal change can throw everything out of sync. The same goes for loose locks or skipping calibration steps. It doesn’t take much.
Fix
To fix micro jitters, always rebalance after zooming, as lens shifts affect balance fast. Plus, use the Auto Check in the app to catch imbalances early. Also, double-check all axis locks before shooting and recalibrate any time you add gear or adjust your setup.
Finally, try disabling IBIS or lens stabilization; in some cases, it causes more shake by fighting the gimbal’s corrections.
Final Words
When learning how to setup gimbal DJI RS3, you don’t need to memorize every detail. However, you do need to respect the sequence. That’s mount, balance, calibrate, and power up.
If you’re a beginner, just follow the basics, balance each axis, and use Auto-Tune after every lens change. Again, if you shoot daily, make it muscle memory, like checking your locks, rerunning diagnostics, and cleaning your setup.
For advanced users, the touch screen becomes your command center. No matter where you’re at, consistency beats shortcuts with the RS3.
FAQs
Why is my RS3 shaking during startup?
Your RS3 is shaking during startup because it’s powered on without a mounted camera. Without weight, the motors overcompensate and cause jitter before entering sleep mode. So, always mount and balance your camera before turning the gimbal on to avoid this.
Do I need to rebalance if I change lenses?
Yes, you should rebalance your gimbal every time you swap lenses, especially zooms. Even small changes in weight or length shift your camera’s center of gravity, making the motors fight harder and causing jittery footage.
What does ‘motor sleep mode’ mean?
‘Motor sleep mode’ means the gimbal has temporarily shut off its motors, usually to prevent damage. This happens when balance is off, payload is missing, or the system detects strain. It’s the gimbal’s way of saying: stop, check your setup, and fix the issue.
Final Setup Checklist (Print or Save This)
✔ Battery charged and inserted
✔ Camera secured with quick-release plates
✔ All axes balanced (confirmed green status)
✔ Auto-Tune completed
✔ Gimbal mode selected
✔ Ronin app connected
✔ Firmware up to date

Leave A Reply
Comment submitted successfully!