Table of Contents
- Key Findings
- How to Balance DJI Gimbal for Beginners
- Step 1: Prepare Your Camera Setup
- Step 2: Lock All Axes & Place Gimbal on a Flat Surface
- Step 3: Balance the Tilt Axis (Front-Back & Vertical Slide)
- Front-Back Plate Slide
- Vertical Arm Adjustment
- Step 4: Balance the Roll Axis (Left-Right Adjustment)
- Step 5: Balance the Pan Axis (Turned at an Angle)
- Step 6: Confirm All Axes Stay Still at Any Angle
- Step 7: Run Auto Calibration from DJI App or Screen
- Common Problems and Fixes When Balancing DJI Gimbal
- Gimbal Tilts When You Let Go
- Fix
- Roll Axis Pulls to One Side
- Fix
- Gimbal Vibrates or Overheats
- Fix
- Auto-Calibration Fails
- Fix
- Payload Too Heavy or Camera Not Centered
- Fix
- When to Add Counterweights
- Fix
- Pro Tips for Speeding Up DJI Gimbal Balancing
- Use a Quick Release Plate with Memory Marks
- Mark Your Balance Points with Tape
- Balance with Your Intended Lens / Focal Length
- Use a Flat Mounting Plate or Portable Tripod
- How to Maintain Your DJI Gimbal After Balancing
- Importance of Recalibrating After Changing Lens/Gear
- Cleaning and Tightening Tips
- How Often to Check Balance
- Motor Protection Habits
- Final Words
- FAQs
- How do I know if my DJI gimbal is balanced properly?
- Can I use auto-calibration instead of manually balancing my DJI gimbal?
- What happens if my DJI gimbal is not balanced?
- Do I need to rebalance my DJI gimbal every time I shoot?
The first time I tried balancing my DJI gimbal, I honestly thought it was broken. I followed a quick video, set everything up, and yet… the camera tilted, the motors whined, and nothing held still. So, if you’re struggling to get your gimbal stable, I’m going to show you how to balance a DJI gimbal step by step.
So, start by fully prepping your camera (battery, lens, accessories), then lock all gimbal axes. Next, balance each axis one at a time, tilt (front-back and vertical), roll (left-right), and pan (rotation), until the camera stays still in any position. Finally, finish with auto calibration.
Furthermore, I’ll explain —
- The step-by-step method for balancing a DJI gimbal
- Common gimbal balancing problems (and how to fix them fast)
- How to use counterweights when nothing else works
- Pro tips to balance faster every time
- Maintaining balance: what to do after the shoot
Key Findings
- Lock all axes, prep your camera with final gear/settings, and adjust tilt, roll, and pan one at a time. Each axis of a gimbal needs to remain still in all angles before you proceed.
- Slumping, drifting, or buzzing usually means one axis is off or not tightly locked tight. Don’t rely on auto-calibration to fix poor manual balance.
- Use memory marks or tape, balance with your final lens/focal length, and always work on a level surface. Recheck the balance after every gear change.
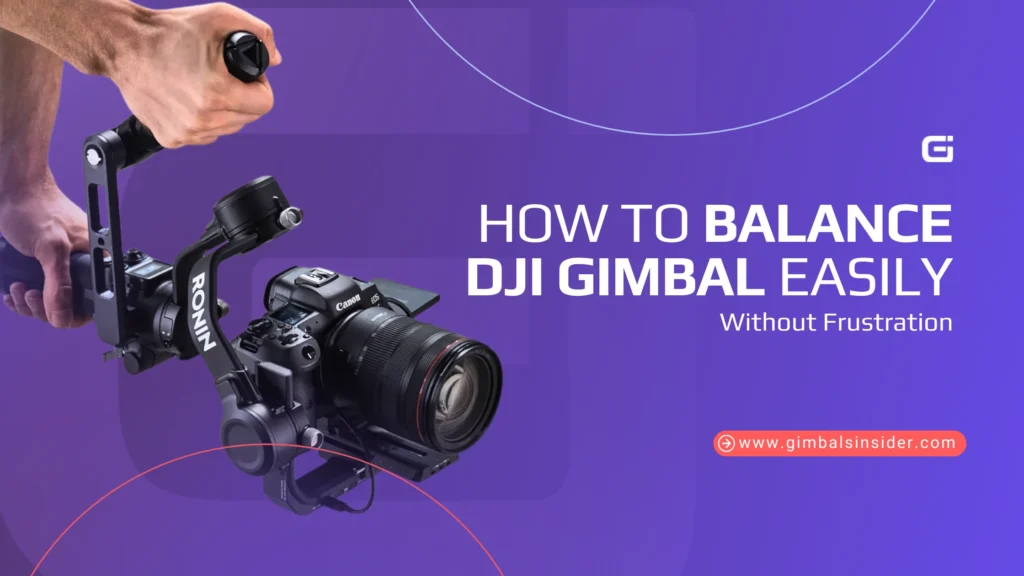
How to Balance DJI Gimbal for Beginners
Let’s walk through the steps of how to balance your gimbal together, one step at a time.
Step 1: Prepare Your Camera Setup
Before anything touches the gimbal, get your camera ready the way you’ll use it during the shoot. That means —
- Install the battery, SD card, filters, and any accessories you’ll keep on during filming.
- Choose your zoom or focal length now. If you change it later, the balance will shift.
- Remove the lens cap and position the LCD screen to its final setting, either flipped out, tilted, or tucked in.
Skipping these will throw off the weight, and you’ll end up rebalancing.
Step 2: Lock All Axes & Place Gimbal on a Flat Surface
Next, make sure Tilt, Roll, and Pan axes are locked. It keeps the arms from swinging while you adjust one at a time.
In this case, set your gimbal on a flat, steady surface. Avoid soft or slanted areas as tilted balancing throws everything off later.
Step 3: Balance the Tilt Axis (Front-Back & Vertical Slide)
Start with the Tilt axis, as this controls your camera’s up and down pitch.

You’ll be adjusting two parts here —
Front-Back Plate Slide
- Here, unlock the camera plate.

- Then, gently slide it forward or backward using the knob until the camera remains level when tilted.

- Now, if it drops or rises on its own, adjust again.
Vertical Arm Adjustment
- Next, unlock the vertical arm (below the camera).

- Slide it up or down until the camera stays upright when vertical.

- If it wants to nod forward or fall back, you’re off-center.
After both feel solid, lock them tight.
Step 4: Balance the Roll Axis (Left-Right Adjustment)
Now move to the Roll axis, which keeps the camera from tilting sideways.
Loosen the roll adjustment knob and carefully slide the camera left or right until it feels balanced.

When it’s close, you’ll notice that if you tilt the camera slightly in either direction, it returns to center smoothly. That’s your cue you’re nearly there.
But here’s where most people mess up: the lock.
Once it looks balanced, tighten the lock firmly. You can do this —
- Tighten the knob until it stops.

- Pull it outward, rotate it clockwise without loosening the actual clamp, then let go.

- Now turn it tighter again. It gives you extra grip.
It matters because if the lock isn’t tight enough, the camera might seem balanced, but it’ll start sliding or bouncing back up when you test it.
So, after locking —
- Tilt the camera left and right slightly. If it stays put and doesn’t swing, you’re solid.
- If it moves or bounces back, your roll axis isn’t fully balanced or the lock needs another firm twist.
Once it feels balanced, lock the adjustment tightly.
Step 5: Balance the Pan Axis (Turned at an Angle)
For the Pan axis, you’ll need to test it at a tilt.
- Hold the gimbal at a slight angle, then unlock the pan arm.

- If the camera swings to one side, it’s not balanced.
- Slide the pan arm slightly forward or back until there’s no movement when tilted.

- Lock it once the camera stays centered.
Step 6: Confirm All Axes Stay Still at Any Angle
With all axes unlocked, test your setup.
- Move the camera into various positions, like facing up, tilted sideways, and angled down. In every position, it should stay still and not drift on its own.
- If anything shifts, revisit that axis and fine-tune again.
It’s better to take a few extra minutes here than stress your motors later.
Step 7: Run Auto Calibration from DJI App or Screen
Once balanced, power on your gimbal.
- Go to the touchscreen or the DJI app and start Auto Calibration. This step tunes the motors to match your specific setup. You’ll hear the gimbal move and buzz a bit—that’s normal. If you’re unsure about the process, here’s a full guide on how to Calibrate Gimbal DJI Mini 3 Pro.
- When it finishes, check the motor status icon. Green means you’re good.
- Yellow or red means the gimbal’s struggling. So, go back and recheck your balance.
Read Also: How to Balance Hohem Gimbal?
Common Problems and Fixes When Balancing DJI Gimbal
Getting your DJI gimbal balanced can be frustrating when things wobble, swing, or just don’t stay where they should. Here’s what to check (and how to fix it) when it’s not behaving.
Gimbal Tilts When You Let Go
If you let go of your camera and it slumps forward or drops backward, the tilt axis is likely off. That axis should hold steady, even if you tilt the camera up or down. If it drops like a weight, something’s out of place.
Fix
- Unlock the tilt axis.
- Slide the mounting plate forward or back. Do this slowly since you’re looking for the spot where the camera stays still when tilted.
- Once it holds position, lock it down tight.
- Test again by moving it to a few angles. No swinging? You’re good.
As G0JlRA from Reddit pointed, “The fact that it fell like a rock and started swinging like crazy after you lifted the camera and let go is all you need to know.”
Roll Axis Pulls to One Side
When the camera keeps drifting to one side, the roll axis isn’t centered. Often, that means the camera is sitting too low or skewed too far left or right on the base plate.
Fix
- Unlock the roll axis.
- Shift the camera gently side to side until it levels out.
- Let go and see if it stays put when tilted. If it leans back, you’re not there yet.
- Once it’s centered, make sure that lock is fully tightened and properly clamped.
Gimbal Vibrates or Overheats
Feel buzzing through the grip? Or the motors heating up more than expected? That usually means the gimbal is still compensating for imbalance, even if it looks OK at a glance.
That’s what Rich8e8 also said, “If it’s not balanced the motors will fight… it won’t work correctly.” –
Fix
- Go back and manually recheck your axis balances, especially tilt and roll.
- Make very small adjustments. A few millimeters can make a difference.
- Avoid using auto-calibration until things feel stable in manual testing.
Auto-Calibration Fails
If calibration stalls, sounds odd, or never completes, your setup probably isn’t close enough to be balanced. Remember, calibration isn’t a fix-all, it fine-tunes what should already be close.
Fix
- Manually balance all three axes first (tilt, roll, pan).
- Make sure each lock is secure.
- Place your gimbal on a steady, flat surface. No tilts, no movement.
- Reboot and retry calibration from the settings menu.
Payload Too Heavy or Camera Not Centered
If your camera setup feels too front-heavy, swings badly, or doesn’t respond smoothly, it could be too heavy for your gimbal or simply mounted wrong.
Fix
- Double-check your gimbal’s payload limits against your camera/lens setup.
- Try removing extras, like battery grips, mics, even lens hoods to lighten the load.
- Reposition your camera to center its weight directly over the tilt axis.
- Raise the vertical mount position if the bottom is too heavy.
When to Add Counterweights
Sometimes, no amount of slider adjustment will fix the imbalance — especially with odd setups (like heavy front lenses or asymmetrical builds). That’s when counterweights come in.
And PMmeCameras pointed it out perfectly, “Counterweights are how you properly balance awkward builds, amigo.”
Fix
- If you’re maxing out a slider and it’s still drifting, it’s time to add a weight.
- Stick a counterweight on the opposite side of the imbalance, often roll or tilt.
- You can use DJI’s official kits, or even DIY solutions like washers and tape. Just make sure they’re secure.
Pro Tips for Speeding Up DJI Gimbal Balancing
Once you get a few key habits down, how to balance phone gimbal will feel like part of your regular camera prep not a hassle.
Use a Quick Release Plate with Memory Marks
If you tend to shoot with the same setup regularly, this one step will save you a lot of time. Some quick release plates (especially from DJI) come with memory marks etched along the edges. Once you’ve found that sweet spot for your camera, those marks let you return to it quickly.
After that, just slide the plate back to your usual position, lock it in, and you’re nearly balanced before even turning the gimbal on. One Reddit user, LV_camera, nailed it, “You should be able to unlock all axes and have the camera stay put in any position.”
That only happens when your gear hits the same spots every time.
Mark Your Balance Points with Tape
If you don’t have a memory plate, use small strips of gaffer tape, or a fine-tip paint marker, to mark your balance positions manually right on the gimbal arms.
It’s a quick workaround that gives you repeatable accuracy. You’ll know exactly where to return each plate, slider, or axis arm. Especially useful if you switch lenses or pack your gimbal down a lot.
Just line things back up to the marks, and you’ll be 90% there.
Balance with Your Intended Lens / Focal Length
Before you start balancing, zoom your lens to the focal length you’ll be shooting with. It’s a simple step, but easy to forget.
See, zoom lenses shift weight as they extend or retract, and that small change can throw off your balance.
So if you’re planning to film at 35mm, don’t set it up at 15mm and expect it to hold. Plus, get your lens where you want it first, then start adjusting your gimbal. It avoids surprises mid-shoot and keeps the motors from working harder than they need to.
Use a Flat Mounting Plate or Portable Tripod
You can’t balance properly if your gimbal’s base is tilted, rocking, or unstable. Even a minor lean will mess with your adjustments. So, always set the gimbal on a flat, firm surface, like a mounting plate or a compact tripod.
If you’re shooting on location, use a foldable tripod or even a hard case lid. Just keep things level.
How to Maintain Your DJI Gimbal After Balancing
Balancing your DJI gimbal is a solid first step but keeping it reliable takes a bit more work. If you want smooth shots every time, a few quick habits will help a lot.
Importance of Recalibrating After Changing Lens/Gear
Whenever you swap your lens, add a mic, or even change your battery setup, you’re shifting the weight. That disturbs the balance you had before. So, it needs a reset.
If you don’t recalibrate, the motors have to fight to stay stable. It drains battery and shortens the life of your gimbal. So, always adjust the balance and run a fresh calibration after making any gear changes.
Cleaning and Tightening Tips
After every use, especially in outdoor shoots, check for dirt around the locks, rails, and plate areas. You can use a microfiber cloth or canned air. And avoid anything damp or oily.
Also, check the locks and knobs. Especially the roll and pan ones. One more thing, a loose clamp may not be obvious at first, until your footage starts bouncing.
How Often to Check Balance
Stick to this: if your setup doesn’t change, check once a week. If you’re swapping lenses or gear, check every time.
You can test quickly. Point the camera up. Let go. Does it stay? If not, rebalance. Simple!
Even a few millimeters off can make the motors overwork. Don’t assume yesterday’s balance is good today.
Motor Protection Habits
You’ll know when motors are stressed! For instance, you’ll hear vibrations, see jerky motion, or feel heat. It usually means something isn’t balanced right.
Here’s what to do —
- Never power on without balancing first
- Don’t expect calibration to fix a bad setup
- Watch for the green icon; if it turns yellow, something’s wrong
Read Our Treading Gimbal News:
- Can You Use Gimbal Without App?
- Can We Carry Gimbal in Flight?
- How to Connect DJI Osmo Mobile 6 to iPhone?
Final Words
When learning how to balance DJI gimbal, remember that it’s more about steady steps than speed. If you’re just starting out, focus on getting your camera fully set up first. That means battery, SD card, filters, all of it.
Then, go one axis at a time: tilt, roll, pan. If something moves when you let go, adjust again. If you’re more experienced, use memory marks or gaffer tape to save your best balance points.
FAQs
How do I know if my DJI gimbal is balanced properly?
Your DJI gimbal is balanced when the camera holds its position in any direction without drifting or swinging. If it stays still on all three axes: tilt, roll, and pan, you’ve perfectly balanced. Meanwhile, movement or wobble means more fine-tuning is needed
Can I use auto-calibration instead of manually balancing my DJI gimbal?
No, auto-calibration helps fine-tune motor performance but doesn’t replace manual balancing. If the camera isn’t balanced first, the motors will strain, causing noise, shake, and battery drain. So, always balance by hand before calibrating.
What happens if my DJI gimbal is not balanced?
If your DJI gimbal isn’t balanced, it’ll vibrate, overheat, and drain its battery faster. The motors struggle to stabilize your camera, which leads to jerky footage and possible long-term wear. Proper balance gives you smooth, pro-level shots.
Do I need to rebalance my DJI gimbal every time I shoot?
Yes, if you change lenses, add filters, or adjust accessories. Even tiny weight changes throw off the balance. So, if your camera’s behaving oddly, recheck the balance before assuming it’s a tech issue.

Leave A Reply
Comment submitted successfully!