
Table of Contents
- Comparison Table of Hohem Gimbal Charging Time
- Steps to Charge Your Hohem Gimbal Without Hassle
- Step 1: Power Off the Gimbal
- Step 2: Find the USB-C Port (Usually on the Handle)
- Step 3: Use a 5V/2A USB-C Cable and Adapter
- Step 4: Plug In and Watch LED Indicators
- Step 5: Unplug After 2 to 3 hours
- Hohem Model Specific Charging Process
- iSteady Mobile+ and Similar Models (LED Indicators)
- iSteady M6 (OLED Screen)
- iSteady XE (Mode Indicator Lights)
- iSteady MT2 (OLED Screen)
- Troubleshooting Common Charging Issues
- Gimbal Not Charging / Not Powering On
- Charging Indicator Keeps Flashing
- Bluetooth Connectivity Issues
- Final Words
- FAQs
- 1. How long does it take to charge a Hohem gimbal?
- 2. What cable do I need to charge my Hohem gimbal?
- 3. Can I charge my Hohem gimbal while using it?
- 4. Why is my Hohem gimbal not charging?
- 5. What is the best charger for Hohem gimbal?
Are you frustrated by slow charges and dead batteries when you need your Hohem gimbal the most? I’ve been there and I know how much it disrupts your creative flow. That’s why I’ll tell you exactly what you should do when it comes to how to charge Hohem gimbal.
Now, to charge a Hohem gimbal —
- Power it off
- Plug into the USB-C port
- Use a 5V/2A adapter and cable
- Watch LED/OLED indicators
- Unplug after 2–3 hrs
From here, I’ll walk through each model’s charging time, simple habits to make your battery last longer, and quick fixes for common issues.
Learn More: How to Charge Your Ronin S Gimbal?
Comparison Table of Hohem Gimbal Charging Time
Before you pick the right Hohem gimbal, charging time matters as much as battery life. A shorter wait means more filming, fewer breaks, and smoother creativity in motion.
| Model | Charging Time |
| iSteady Mobile+ | 2 hours (5V 2A) |
| iSteady V3 | 2.5 hours (5V 2A) |
| iSteady Q | ~45 minutes (5V 2.4A) |
| iSteady M6 | 3 hours (5V 2A) |
| iSteady XE | 2.5 hours (5V 1.5A) |
| iSteady MT2 | 3 hours (5V 2A) |
Steps to Charge Your Hohem Gimbal Without Hassle
You must charge your gimbal properly. That way, it’ll extend battery life, save downtime, and keep you ready for the next shoot.
Step 1: Power Off the Gimbal
Turn the gimbal off, it’s a must! If it stays powered, Bluetooth and background processes quietly drain the battery. On models like the iSteady Mobile+, you must shut it off if you plan to use the reverse charging feature later.
Step 2: Find the USB-C Port (Usually on the Handle)
Your next move is finding the right port. On most models, the charging port is on the handle. Some, like the M6 or MT2, also have a second Type-C port on the tilt motor for reverse charging.
Step 3: Use a 5V/2A USB-C Cable and Adapter
Stick to the cable that comes in the box. Most models ship with a Type-A to Type-C cable, while the M6 adds a USB-C to USB-C option. Pair it with a 5V/2A wall adapter (not your laptop).
Remember, computer USB ports only push out 0.5–0.9A. That’s why it takes way longer to charge than it should.
Step 4: Plug In and Watch LED Indicators
Once you’re connected, check the lights or screen. Each model shows charging in its own way —
- iSteady Mobile+ / XE: Four LEDs blink while charging, then stay solid once full.
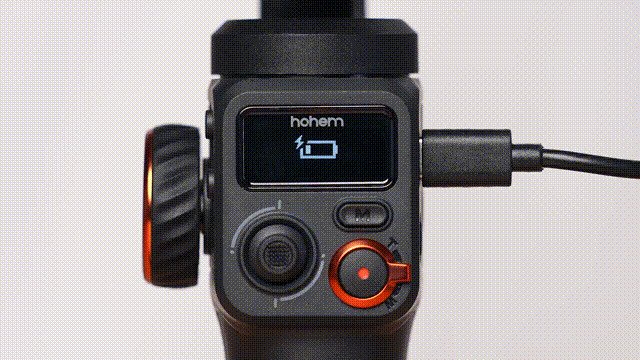
- iSteady M6 / MT2: The OLED screen shows a flashing battery icon until it’s charged.
- iSteady V3: A multi-color LED cycles between red, yellow, and green depending on the level.
Note: Red blinking means charging, blue solid means full.
Step 5: Unplug After 2 to 3 hours
A full charge usually takes 2 to 3 hours with the right adapter. The batteries have built-in protection. However, it’s still best to unplug once topped off, as it keeps things cooler and healthier.
If you’re storing the gimbal for weeks or months, leave it around 50%. That sweet spot keeps the battery from wearing down too soon.
Read Also: How to Balance Hohem Gimbal?
Hohem Model Specific Charging Process
Charging works a little differently depending on which Hohem gimbal you’re using. Each model has its own way of showing charge progress and battery level.
Here’s how to read the signals so you don’t waste time guessing.
iSteady Mobile+ and Similar Models (LED Indicators)
Plug in the gimbal with the Type-C cable and a 5V/2A adapter. While it’s charging, the four LEDs on the handle will blink. When all four lights stay solid, the battery is full. To check the level at any time, tap the power button once —
- 1 LED = ~25%
- 2 LEDs = ~50%
- 3 LEDs = ~75%
- 4 LEDs = 100%
iSteady M6 (OLED Screen)
Use the included Type-C cable and a 5V/2A adapter. A flashing battery icon shows up on the OLED screen while it’s charging. If you want to check the level, press the power button once, and the screen gives you the percentage or battery icon right away.
iSteady XE (Mode Indicator Lights)
Connect the XE with the provided cable. While charging, the mode indicator lights will blink. Once all four hold steady, the gimbal is fully charged. To see the level, press and hold the function button
The more lights you see, the higher the charge.
iSteady MT2 (OLED Screen)
The MT2 uses a Type A-to-C cable and a 5V/2A adapter. To check the charge, press the power button once. The OLED screen will show you the battery percentage or icon instantly.
Troubleshooting Common Charging Issues
Here’s a straight rundown on when your gimbal refuses to charge or connect and how you can solve them.
Gimbal Not Charging / Not Powering On
Start simple which means —
- Use the original Type-C cable and a 5V/2A adapter.
- Test both on another device to be sure they’re not the problem.
- If you’re setting up for the first time, fully charge the gimbal before powering it on.
- To check the battery, tap the power button. The LEDs will tell you the level (1 light = 25%, 4 lights = full).
- If it still won’t charge or turn on, it’s time to contact Hohem support.
Charging Indicator Keeps Flashing
Flashing lights usually mean the gimbal is charging. If it’s been blinking for 4–5 hours and never shows full, check the adapter. Use only a 5V/2A wall charger, not a fast-charging brick. Still flashing? Swap out the cable—Type-C cords wear out more often than you think.
Bluetooth Connectivity Issues
If Bluetooth won’t reconnect after charging, clear the pairing on your phone and reconnect through the Hohem Joy app. Don’t pair it directly in phone settings. On the iSteady M6, there’s a reset shortcut. Just hold the M button for 5 seconds while pushing up the zoom lever.
Also, double-check your app and firmware are up to date as they fix more connection bugs than you’d expect.
Final Words
Learning how to charge Hohem gimbal the right way saves time, protects the battery, and keeps your shoots smooth. Each model has its quirks, but the basics stay the same.
Just power off first, use the right 5V/2A adapter, and watch the lights or screen for progress. Also, avoid weak laptop ports, unplug once full, and store at half charge if you’ll be away.
With a little attention, your gimbal lasts longer, charges faster, and stays ready!
Read Our Latest Article:
FAQs
1. How long does it take to charge a Hohem gimbal?
Most Hohem gimbals, like the iSteady Pro 4, take 2-3 hours for a full charge using a 5V/2A adapter. Remember, charging time varies by model, so check your battery capacity for precision.
2. What cable do I need to charge my Hohem gimbal?
Use a standard USB-C to USB-A cable rated for 2A. Official Hohem cables ensure compatibility and safety. Also, avoid cheap knockoffs to prevent connection issues during your shoots.
3. Can I charge my Hohem gimbal while using it?
Yes, but it’s not recommended as it reduces efficiency and generates heat. For best results, charge when powered off to preserve battery health and avoid interruptions mid-video.
4. Why is my Hohem gimbal not charging?
Common causes include a dirty port, faulty cable, or low-power source. Clean the USB-C port, try a different adapter, or reset via the Hohem app. If persistent, check warranty support.
5. What is the best charger for Hohem gimbal?
Opt for a 5V/2A wall charger or portable power bank like Anker’s 10,000mAh model. Steer clear of quick-charge PD adapters over 10W to avoid damage—stick to specs for longevity.

Leave A Reply
Comment submitted successfully!